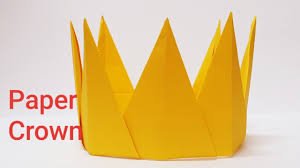
Making a crown is a fun and creative project suitable for school activities, costume parties, birthdays, or themed events. With just a few simple materials, you can create a beautiful and personalised crown that fits any occasion. Whether you’re making one for a child or yourself, here’s an easy guide on how to make a crown.
- Gather Your Materials
To make a paper crown, you will need:
- A sheet of cardstock or thick paper
- Pencil and ruler
- Scissors
- Glue or tape
- Decorative items like glitter, stickers, coloured markers, sequins, or gems
- A stapler or string (optional)
- Measure the Head Size
Wrap a strip of paper around your head (or the person who will wear it) to measure the correct size. Mark where the two ends meet and use this as a guide for the length of your crown. Most adult heads require about 55–60 cm. - Draw the Crown Shape
On your sheet of cardstock, use a pencil and ruler to draw a band as long as your measured head size and about 10–15 cm tall. Add triangle, curved, or pointy shapes along the top edge to create the crown’s peaks. Be as simple or detailed as you like. - Cut Out the Crown
Carefully cut along the outline of the crown, especially around the pointed designs. If your paper is not long enough, cut two strips and join them together with tape or glue to make the correct length. - Decorate the Crown
Now it’s time to be creative. Use coloured pens or markers to add patterns or names. Glue on shiny paper, gems, stickers, or glitter to give your crown a royal touch. Let it dry if you use glue or paint. - Join the Ends Together
Wrap the crown around your head again and fasten the ends together. You can use tape, a stapler, or punch small holes at each end and tie them with string or ribbon for a more adjustable fit. - Wear and Enjoy
Once your crown is secure and dry, place it on your head and enjoy your handmade creation. It’s perfect for school plays, dress-up games, or celebrations.
Also Read: How To Lock A Cell In Excel Formula